For some background to this, see my post on a comparison of bike route mapping websites. This is part one of a three part series in which I will show how to using Google Earth to create an automated flythrough tour, a curated tour, and a video of a tour. As the 2nd and 3rd parts are published, I’ll update this post to hyperlink to them.
There are two types of virtual tours you can create with Google Earth and I’m not sure what the proper terms are for them so I’ve made an executive decision to refer to them as the “automated flythrough tour” and the “curated tour”. In this post, I’m going to show you, step-by-step, how to create an automated flythrough tour from an imported bike route and I’ll just go ahead now and show you what that looks like…
I have used MapMyRide to export my bike route to a KML file. If you followed my direction at the top of this post to see my post on bike route mapping websites, you’ll know that MayMyRide is best for this task and I recommend using that site to export your route for use in Google Earth even if you don’t regularly use it for creating routes and cue sheets. If you export your KML from one of the other mapping websites, you’ll see very different results in the treeview in Google Earth.
Step 1 – Open Your KML File in Google Earth
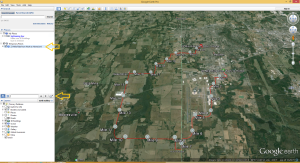
To import your bike route into Google Earth, simply select Open from the File menu, browse to your exported KML file, and open it. Once imported, you’ll see the title of your KML file listed under Temporary Places in the Places panel on the left of the screen. At the bottom of the Places panel, you may also notice a Play Tour command button. This is not exactly what we’re looking for and depending on the contents of your KML file, you may see some very strange results from this command. What this actually does is automatically play through all of the artifacts within the selected folder, which in this case is the KML file.
Step 2 – Review the Contents of your KML File
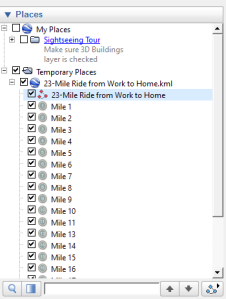
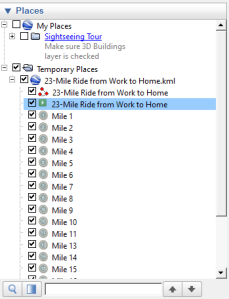
If you’ll click the plus (+) symbol to the left of your KML file in the Places panel, it will expand to show all the imported contents.
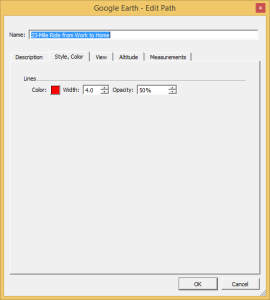
The first item is a path having the same name as the KML file. If you’ll right-click on the path and choose Properties from the context menu, you’ll see that you can manipulate how the path is shown to a certain degree. The most interesting to me is the path color, width, and opacity (transparency).
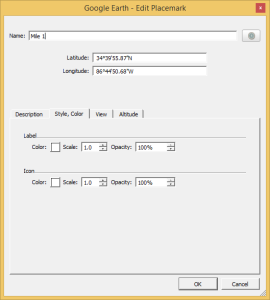
The next items are all the various mile markers and, if you’ll view the properties of these, you’ll see (from the title of the properties dialog) that Google Earth considers these Placemarks.
You’ll see that there is some control over the color and opacity of both the icon and the label. If you’ll look up to the top toolbar, you’ll notice that there is a command, Add Placemark, that will let you manually add more placemarks to your route.
If you choose to add a placemark manually, you’ll see that it is added as a pushpin by default. There is a very obvious Style, Color tab from which you can change the color of the icon and label, but this does not have any option of changing the icon itself. To do so, click the small button to the right of the placemark name.
In this dialog, you’ll find a standard library of icons along with a command to Add a Custom Icon.
Important Note
If during your investigation you find that some of the commands I write about are disabled, it is probably because your My Places has been modified and you need to save it before moving on. (I’m not sure why the designers of Google Earth thought it was necessary to place this restriction, but we need to roll with it as long as it exists.) Choose the Save My Places command from the File->Save menu and you should see all the commands enabled again.
Step 2 Continued
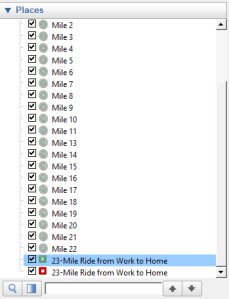
If you’ll scroll down past all the mile marker placemarks, you’ll see placemarks representing the begin and end points of your route.
Give that the begin point should precede mile marker 1, I recommend that you drag the begin point up and drop it between the path and the mile marker 1 placemark. This is not important now, but it will be useful when we want to create a curated tour in part two.
Step 3 – Create the Automated Flythrough Tour
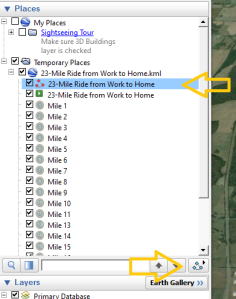
If you’ll select your path, you’ll see that the Play Tour button changes slightly to show that you will be playing a tour from a path (rather than a folder, which is what we saw earlier).
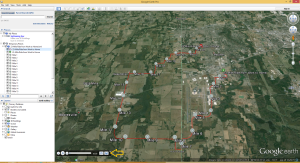
Click that and Google Earth will begin to play a virtual tour along your path from a point of view of 100 feet above and behind you. (If your route goes through an area in which 3D buildings have been added, it gets even more interesting.)
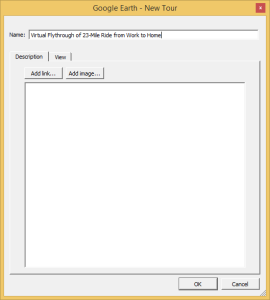
At the bottom left of the earth view, you’ll now see some player controls by which you can pause, rewind, fast forward, or restart the tour. But most importantly for our purpose, there is a Save button. Click that and you’ll get a dialog where you can title your tour or add information such as a links or images.
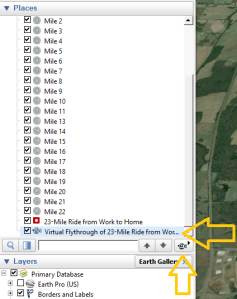
Once you complete this dialog and click the OK button, your tour is placed at the bottom of the Temporary Places in the Places panel.
If you select the tour, you’ll notice that the Play Tour button changes yet again to indicate that it will play that exact tour so you can go back at any time to play it.
Step 4 – Save Your Tour to My Places
Now, if all you wanted to do is review the tour, you could leave it under Temporary Places or even save it off into a KMZ or KML file. But in part three of this series, we’re going to want to create a video from this tour and it is important to have it under My Places. So, right-click on the tour and choose Save to My Places from the context menu.
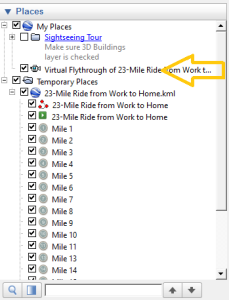
Once you do this, you’ll see your virtual tour under My Places in the Places panel.
Before doing much more, you’ll see to save My Places again from the File->Save menu.
Options
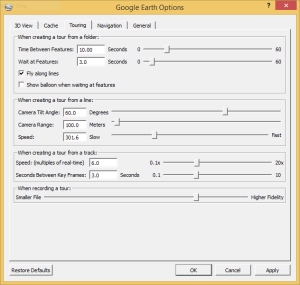
If you select the Options… command from the Tools menu and click on the Touring tab in the Options dialog, you’ll see various parameters mostly regarding speed and time. I haven’t investigated this very much except to know that to speed up my virtual tour, I need to change the Speed slider under the “When creating a tour from a track” group (and not the one above it). The Camera Tilt Angle and Range look very interesting, but that is also on the rainy day research to-do list for now.
Closing
I hope someone stumbles across this and finds it helpful. It took me some time to figure out this procedure since a lot of the documentation and tutorial videos seem to be out of date (with the latest Google Earth version) or on slightly different topics. If you have any comments, corrections, or suggestions, please don’t hesitate to leave them in the comments section.



Pingback: Create a Curated Tour from a Bike Route Using Google Earth | Bike Lane Ends
Pingback: Create a Video from a Bike Route Tour Using Google Earth | Bike Lane Ends